Non-woodworking blather:
I've tried a few different coffee-making methods at home including the conventional drip maker, a pour-over pot and a single-cup press. I didn't find that any of them consistently made good coffee and none are particularly convenient either, especially for making the single cup I usually want. For that reason I switched to a k-cup pod coffee maker when I retired in 2018 which while it makes about the same quality of coffee, it's at least more convenient.
The vast majority of pod makers have a tank with enough water for many cups of coffee so the machines are fairly large and kind of need to sit on the counter (or I suppose I could, like, put it in the study - but that seems weird). Anyhow I like lots of counter space and already the microwave, knife block, phone, fruit bowl, kettle, tissue box, phone charger, etc. clutter it up enough of it so I wouldn't want to lose another foot to a coffee pot. For this reason I've been using a single-cup machine and storing it in a cupboard between uses.
Unfortunately the pod makers are more mechanically complex than the other types I've tried and have a correspondingly poorer reliability. The four that I've gone through average only 18 months before failure. This is pretty poor but at least the per-cup cost of the pot is less than 10% of the actual coffee cost, making it more of an annoyance than a financial burden.
Of course I needed to find some pod coffee that I liked so originally I compared 8 different types and ended up with three "winners" that I would rotate through. This comparison was complicated by the fact that either the pods (or more likely my taste) varied from cup to cup so I needed to rate and then average a dozen or more cups of each type. This was just done as part of my normal coffee drinking routine so it wasn't really a burden. Unfortunately all the winners were American-sourced so I had to do this again with Canadian brands when the yanks turned hostile in 2024. That was a bit more involved since I had no good recommendations to start with so I ended up comparing 18 different types with each other (and the three original coffees as a reference) and selected three "Canadian" pod coffees. Of course no coffee is sourced from either Canada or the US so the "nationality" is the roasting and packaging location.
Woodworking blather:
I suppose for a more-integrated look I could have tried to see if I could find something matching the current countertops - a piece of assembled countertop or the laminate itself - but that seemed improbable, and besides I have a shop full of wood. Of course I chose cherry to match the cupboards and added a couple triangular support gussets that screwed to the underside of the countertop overhang to hold it in place. It was simple enough to whip together without plans, but I made one anyway since otherwise what would I put under this description?
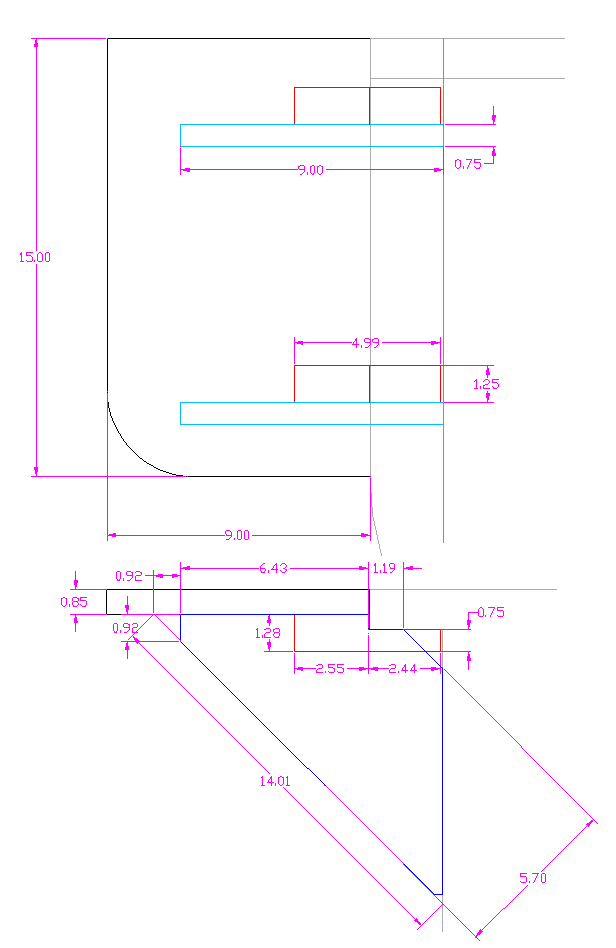
The not-strictly-needed plan
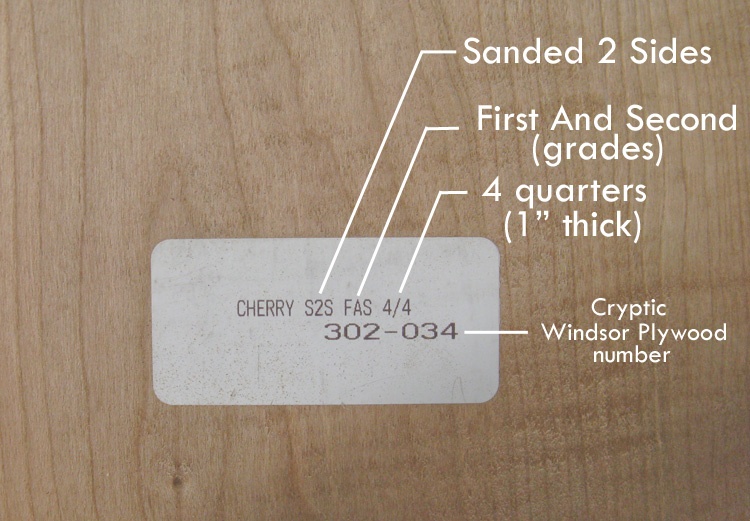
Cherry label - decoded
I had a nice cherry plank in the shop that would work just fine for the table. It was inconveniently long for a photo so instead I just took a shot of the label.
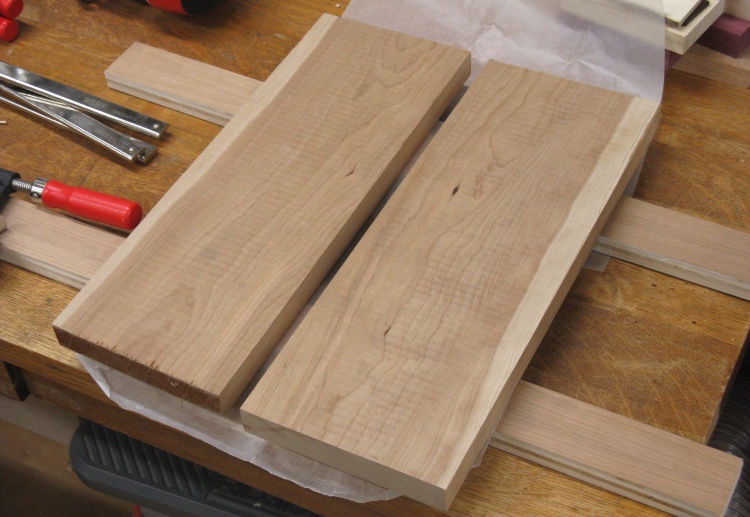
A pair of nice boards
I started by cutting a couple of 15-1/2" lengths of the board. The edges facing each other were jointed so they would be square and straight.
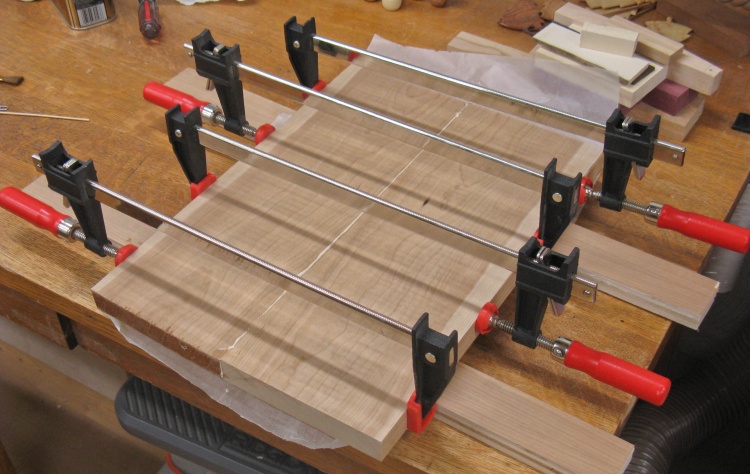
Gluing up the 2-piece top
A bit of glue and those straight edges were aligned and the boards clamped.
Planing flat
I thought that the white sapwood on the outside edges of the boards actually looked pretty nice but didn't really go with the design of this little table. A bit of band saw work took care of them.
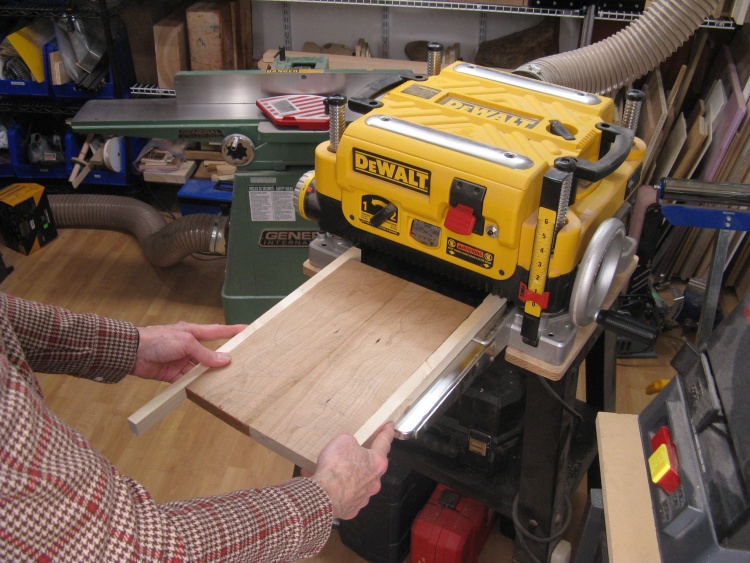
Next was planing the composite board to remove any unevenness due to the gluing. In this shot I'm putting it through the planer with some longer side boards to prevent snipe.
Next was planing the composite board to remove any unevenness due to the gluing. In this shot I'm putting it through the planer with some longer side boards to prevent snipe.
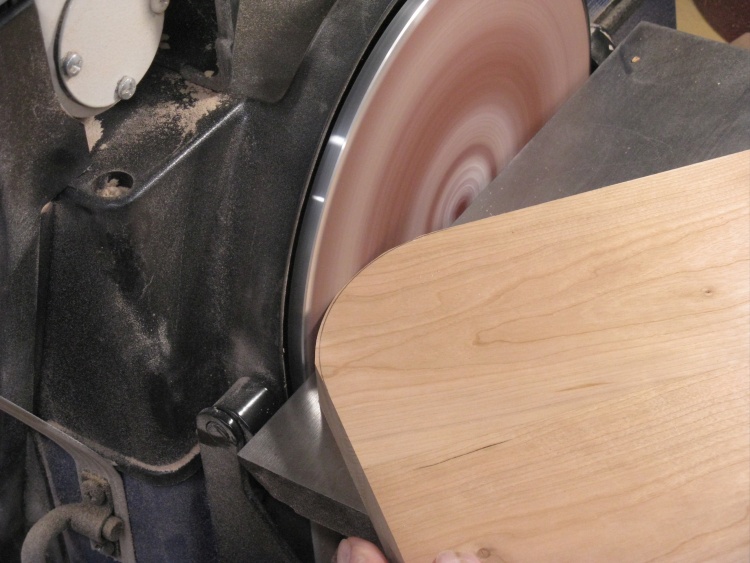
Rounding the outside corner
The outside corner of the top was rounded, as much for safety as aesthetics. It was cut roundish on the band saw and then the disc sander was used to refine the curve.
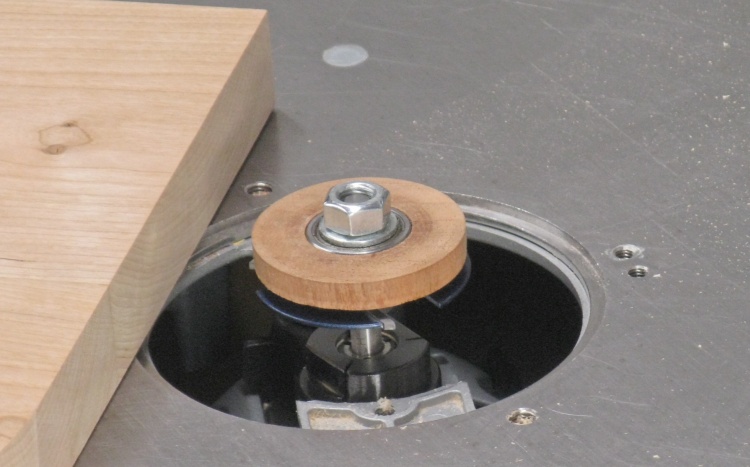
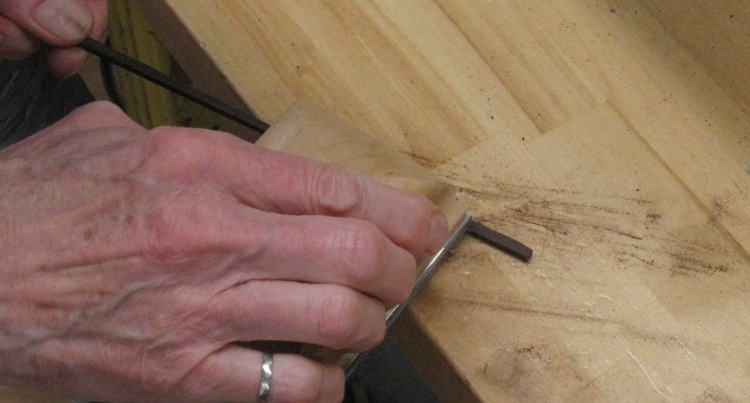
Cutter for a 1/16" slot
The top looked pretty plain so I thought I'd add a bit of "interest" with some contrasting trim that would match the skirts of our cherry dining room table that will be only a few feet away.
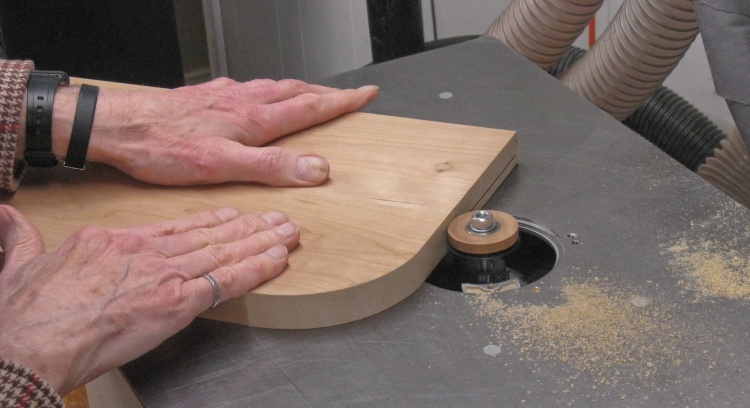
African Blackwood will be used for the trim and fits into shallow slots in the edge. That was going to need a couple of 1/8"-wide slots so to make those I used a couple passes of this 1/16" cutter.
The disc of wood sitting over the cutter serves to limit the depth of the slot to around 1/16".
African Blackwood will be used for the trim and fits into shallow slots in the edge. That was going to need a couple of 1/8"-wide slots so to make those I used a couple passes of this 1/16" cutter.
The disc of wood sitting over the cutter serves to limit the depth of the slot to around 1/16".
Starting on the slots
It took only a few minutes to cut the slots on the front and outside edge.
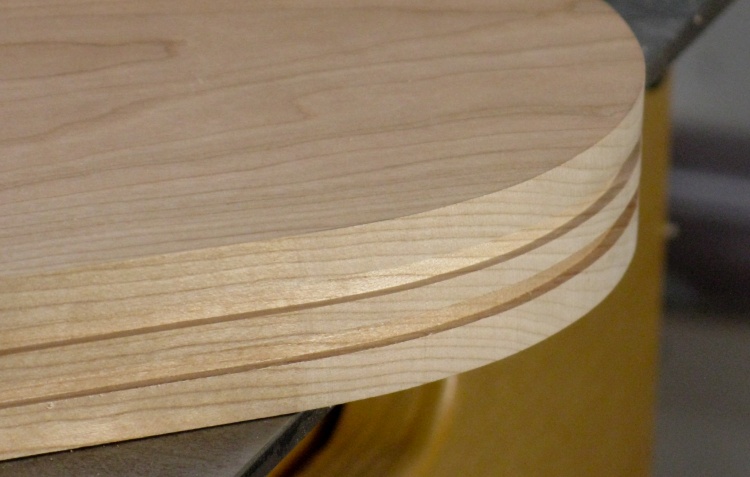
The two 1/8" slots done
This shot shows the two completed slots and they look pretty clean. That's impressive considering I used this bit to cut several feet of slots in aluminium a couple years ago. Go carbide!
Cutting up some African Blackwood
I dug out a little bag of scraps of African Blackwood (I've used it for trim in the past). There was enough (barely) to make the trim.
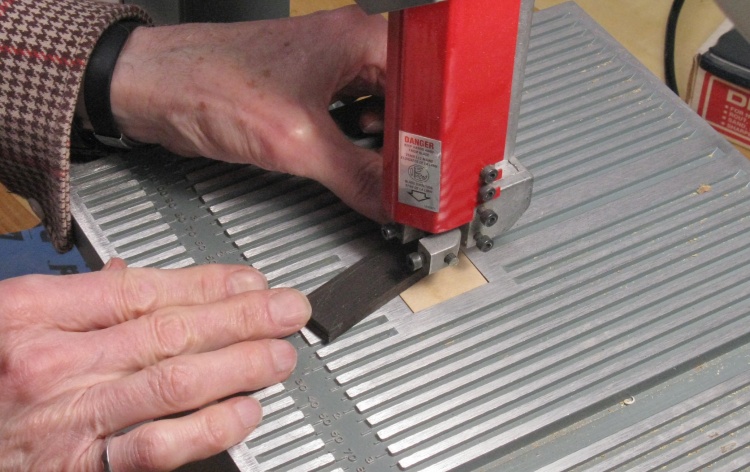
Here I'm making a round cutout in a piece that will be used for one of the curved sections of the trim.
Here I'm making a round cutout in a piece that will be used for one of the curved sections of the trim.
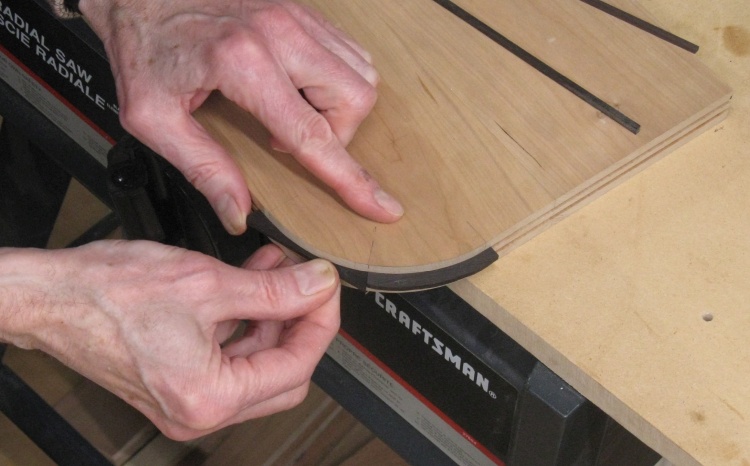
Fitting pieces around the curve
That cut yielded these two pieces which I'm test-fitting in this shot. I sanded the ends to matching angles so they fit together tightly.
Tapering a straight piece
My scraps included some 1/8"-thick sections that could be used directly. Here I'm using the sanding block to taper the edge a bit so the trim will wedge tightly into the slot for a seamless, um, seam.
Fitting in a straight piece
Almost all the pieces are done in this photo.
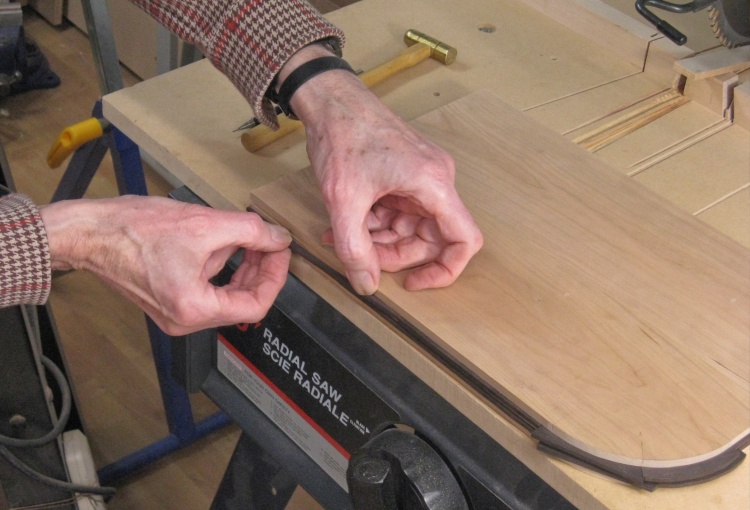
I was in the middle of another project when I needed to make this table and my main bench is full of tools and wood for that one. So I moved over and did some of the work on the radial arm saw table.
I was in the middle of another project when I needed to make this table and my main bench is full of tools and wood for that one. So I moved over and did some of the work on the radial arm saw table.
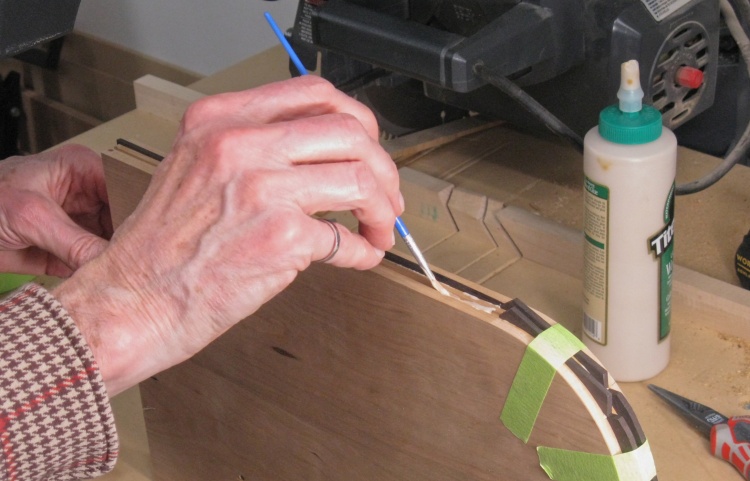
Gluing in the trim pieces
All of the trim pieces were glued into place at one go. The corner pieces got tape to hold them in place since they were not as tight a fit as I might have liked. The other trim bits fit tightly and were held in through the Magic Of Friction.
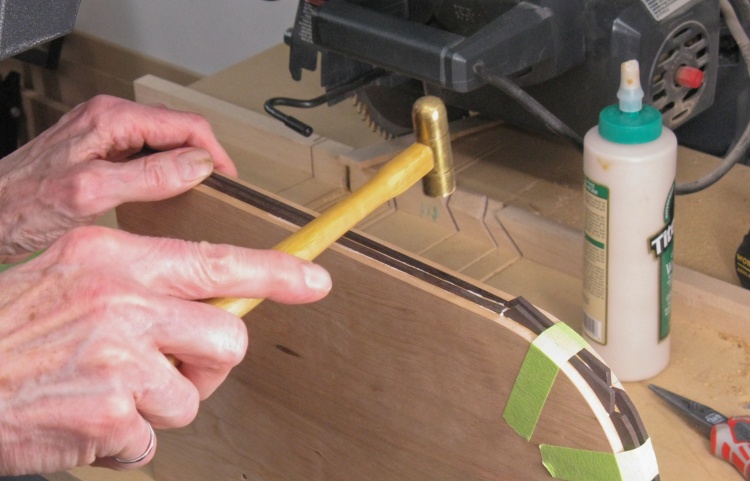
Tapping into place
Several of the trim pieces were tight fits and needed to be tapped into place with a tiny little hammer.
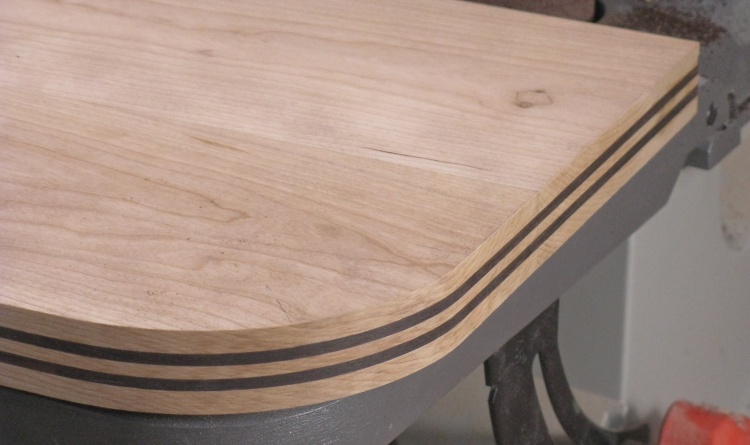
The trim after edge sanding
Once the glue had dried, the excess trim was sanded off flush using a belt sander, producing this rather neater-looking edge.
The pieces of the almost grainless African Blackwood fit together nicely so the seams between the trim pieces are not even visible. There are actually six seams in this shot.
The pieces of the almost grainless African Blackwood fit together nicely so the seams between the trim pieces are not even visible. There are actually six seams in this shot.
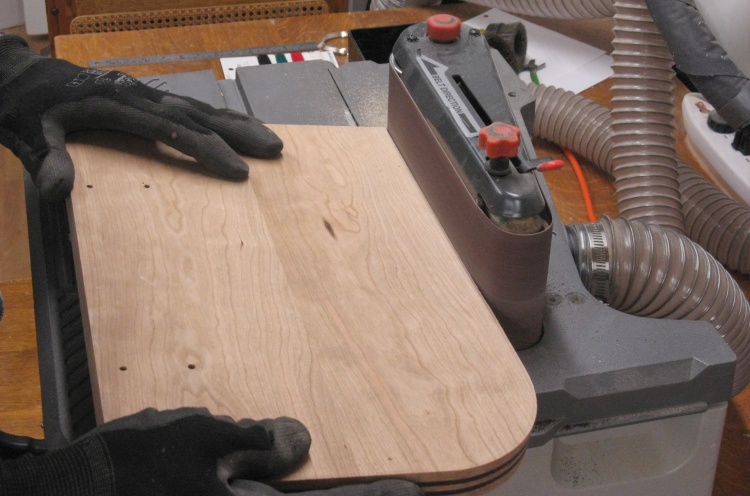
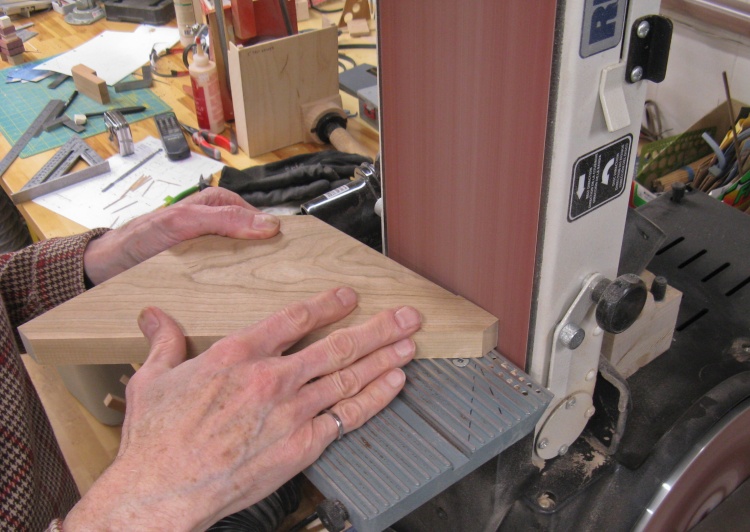
Sanding facets in the edge
After sanding the trim flush, the outside edge was flat but the plan was to have it slightly curved.
The first step was to sand facets from the top and bottom sides around the edge, accomplished with a large but shallow wedge attached to the sander table (hidden under the cherry piece in this shot).
The first step was to sand facets from the top and bottom sides around the edge, accomplished with a large but shallow wedge attached to the sander table (hidden under the cherry piece in this shot).
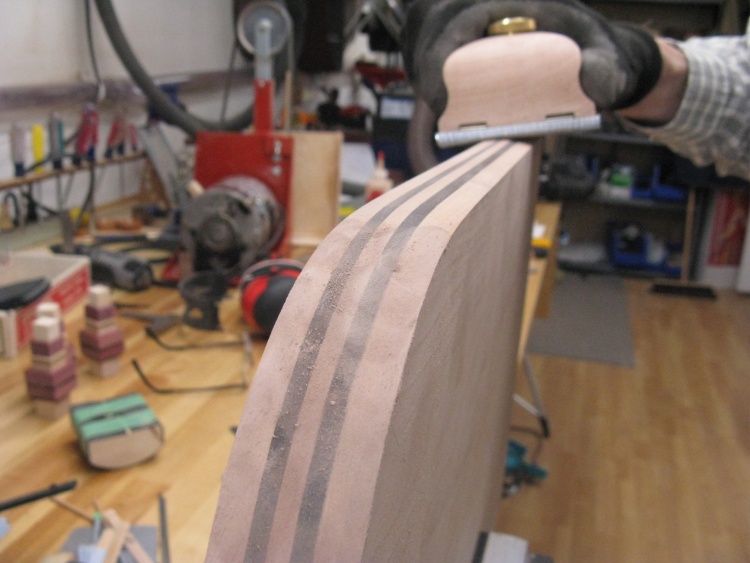
Hand-sanding to get a nice curve on the edge
Then that faceted edge was rounded with a heaping helping of hand sanding. In this shot I've gone through the coarser grits and I'm finishing up with some 320 grit.
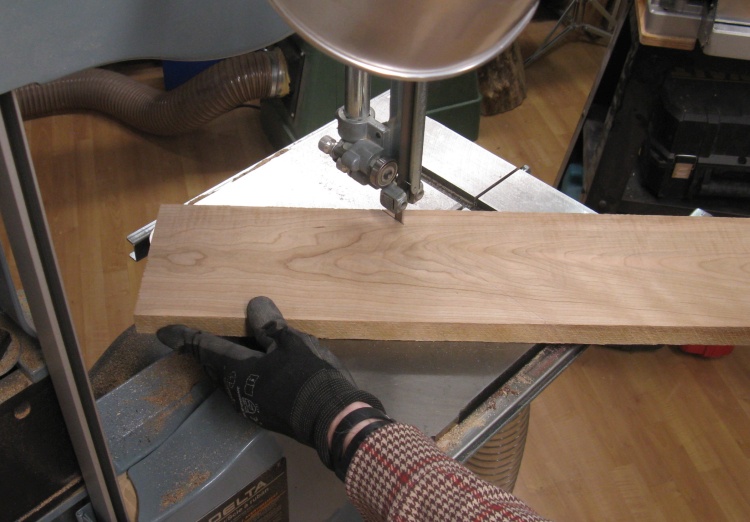
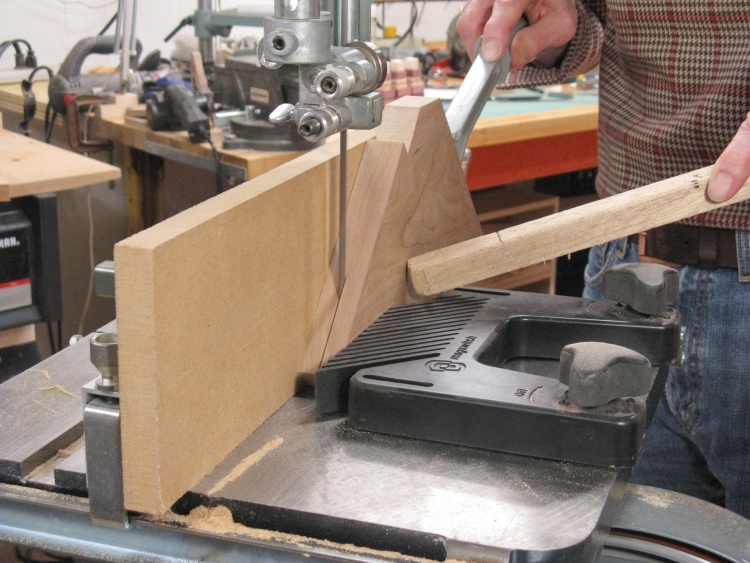
Cutting out a piece for the gussets
That was about it for the top.
Next up was the support structure;
The table would be cantilevered from the current counter top so I needed a pair of gussets to transfer weight to the side of the cupboard.
Here the cherry plank is back and I'm cutting off a piece to turn into gussets.
Next up was the support structure;
The table would be cantilevered from the current counter top so I needed a pair of gussets to transfer weight to the side of the cupboard.
Here the cherry plank is back and I'm cutting off a piece to turn into gussets.
Slightly curving the bearing surface
I checked the mounting location for the table and was unsurprised to find that the cupboard was neither perfectly square nor perfectly vertical, so the ideal 90° gusset wasn't going to cut it.
To establish a known point of contact I cut a relief on most of the cupboard-side of the gusset, leaving only an inch or so at the bottom protruding for contact. I then gently rounded that face on the belt sander so it would contact only near the middle.
To establish a known point of contact I cut a relief on most of the cupboard-side of the gusset, leaving only an inch or so at the bottom protruding for contact. I then gently rounded that face on the belt sander so it would contact only near the middle.
Slicing the thickish wood into two gussets
My plank was upwards of an inch in thickness and the gussets didn't need to be nearly that thick to hold up a 5-pound coffee pot.
That let me slice the plank up "the hard way" to get two gussets about 0.4" thick each after a bit of planing and sanding.
That let me slice the plank up "the hard way" to get two gussets about 0.4" thick each after a bit of planing and sanding.

Making the screw-in brackets
The mounting scheme also needed wood brackets to attach the table to the counter. The bracket shape is stepped to ensure the top of the table is level with the countertop.
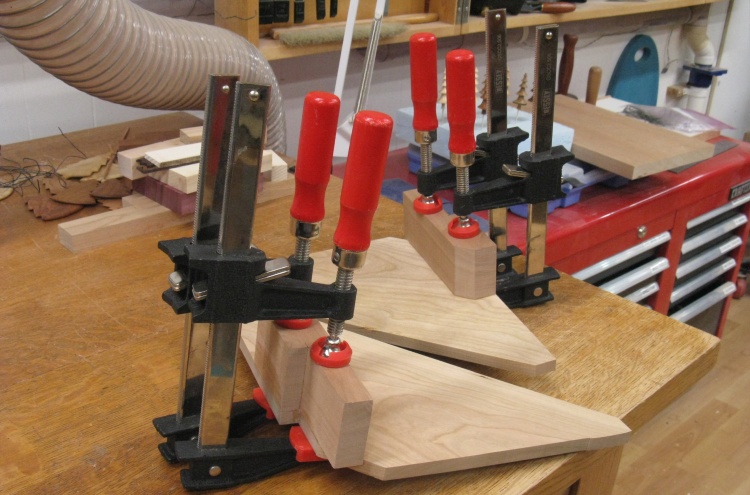
Attaching the brackets to the gussets
Rather than separately attach the brackets and gussets to the table, each pair was glued together to form a single assembly.
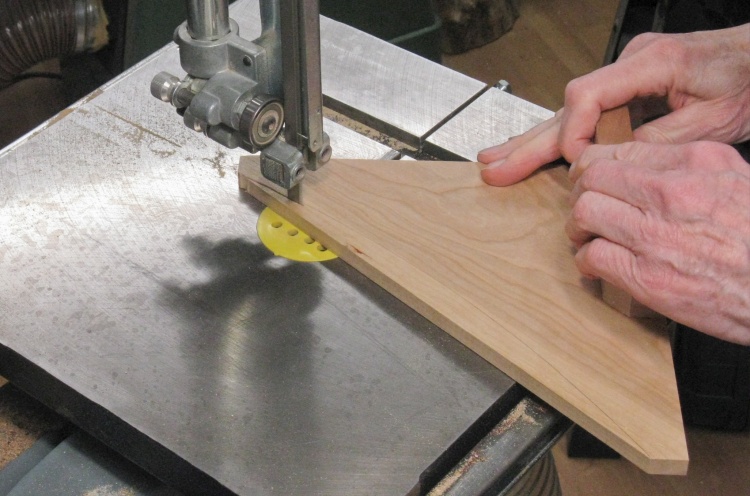
Curving the gusset for 7.5% more fancy-ness
My triangular gussets looked a bit plain so I cut a curve in the angled side.
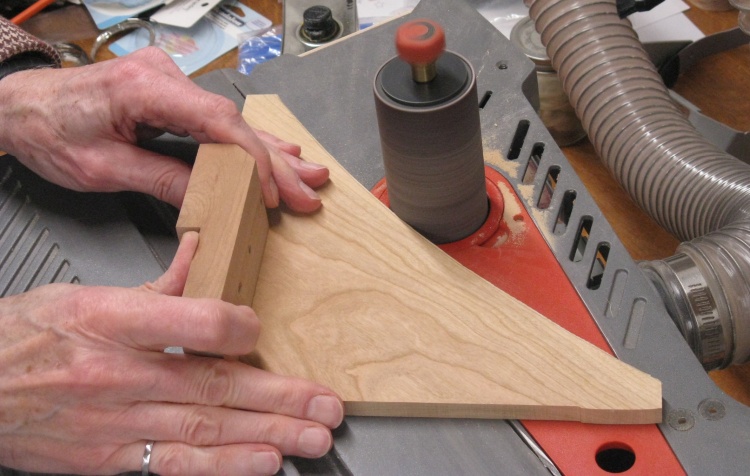
Smoothing the curve
...and then removed the cut marks with the spindle sander.
That was followed up with hand sanding using a curved form to further smooth the curvature.
That was followed up with hand sanding using a curved form to further smooth the curvature.

A final sanding
And finally everything got a final sanding up to 320 grit.
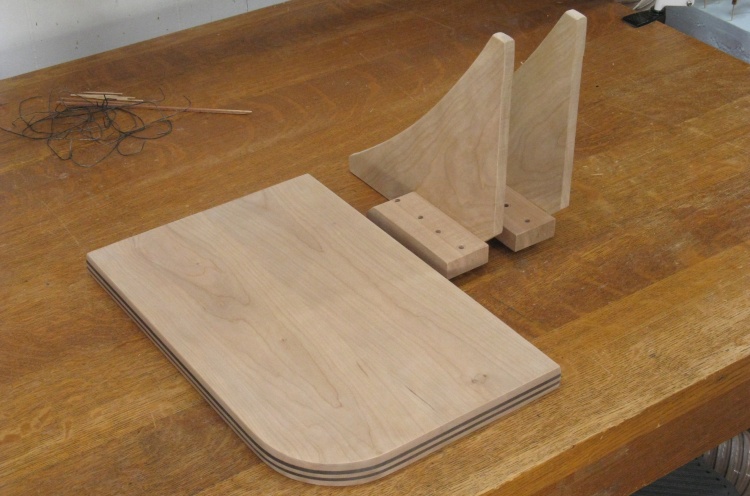
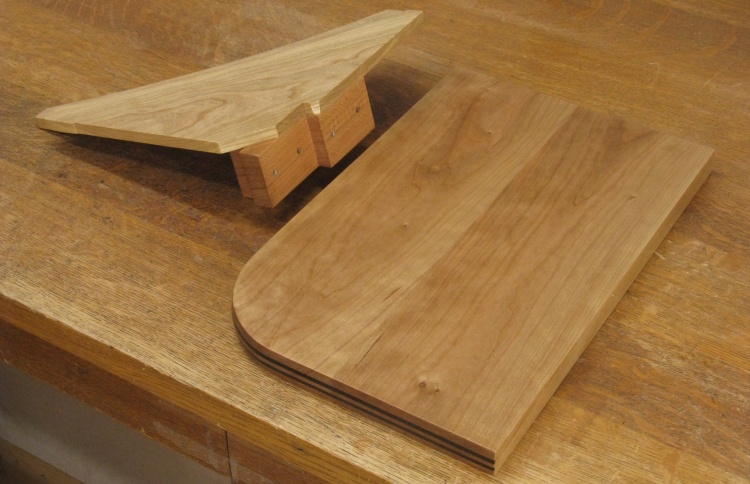
All the woodworking done
That's all the pieces done.
I had sized the brackets and gussets and located the screw holes with a dry fit to make sure everything would correctly align before starting the finishing.
I had sized the brackets and gussets and located the screw holes with a dry fit to make sure everything would correctly align before starting the finishing.
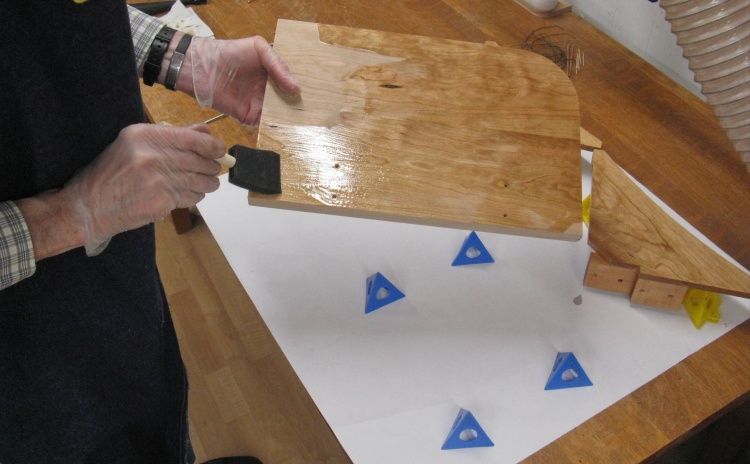
Starting with the varnish
I used my standard finish; 3 coats of minwax Fast-Dry Polyurethane in satin finish. I usually apply the first coat with a sponge or bristle brush (sponge in this case, obviously) and then use a cloth-covered sponge brush for the final two coats. The cloth seems to provide a smoother surface when it is all done. And as usual the surface is roughened up with 220 grit sandpaper and/or fine steel wool between coats.
First coat of varnish on.
The first coat of varnish is performing its "make-the-colour-way-nicer" thing as it dries.
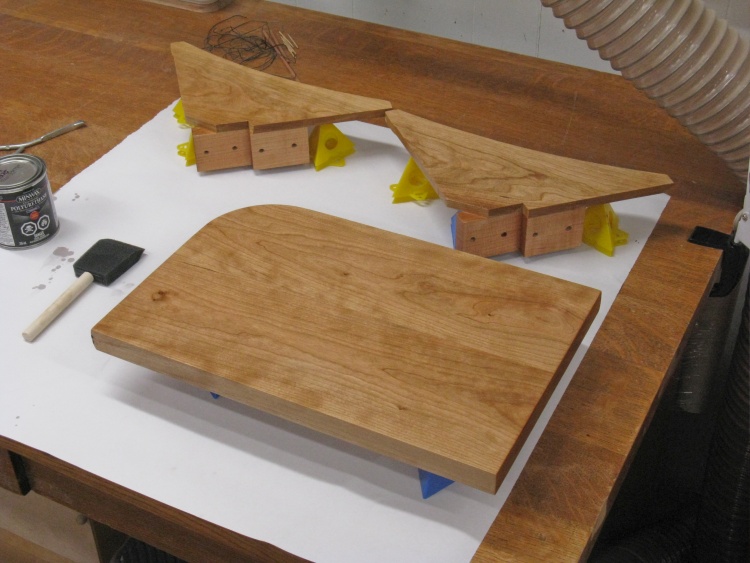
The completed pieces
Done.
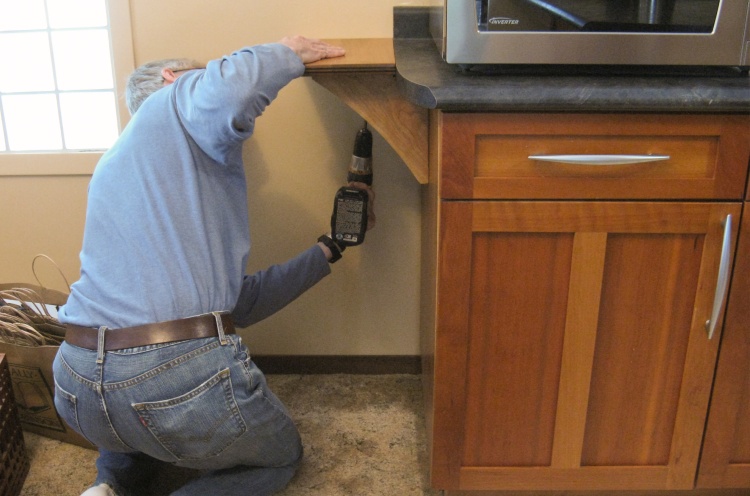
Installing the table
I had drilled holes on the underside of the counter and table during the fit test so it was just a matter of getting upside-down to put the screws and wood pieces in place.
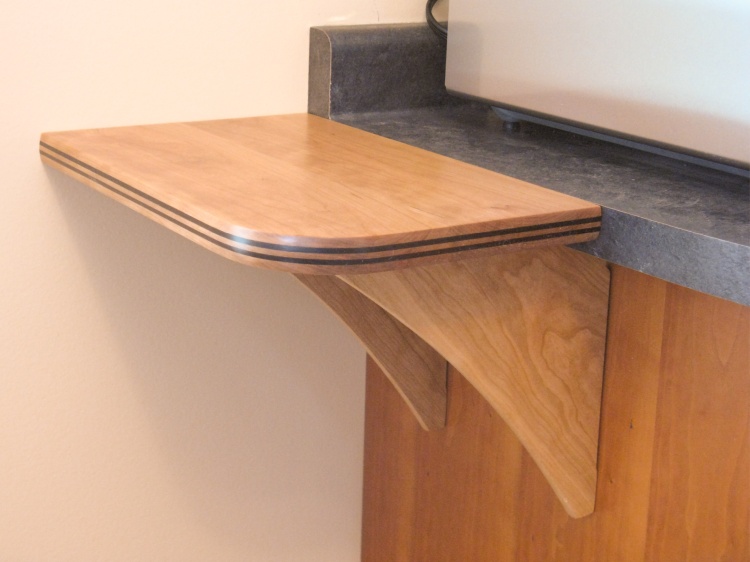
The end result
Whew - Still lines up with the counter.
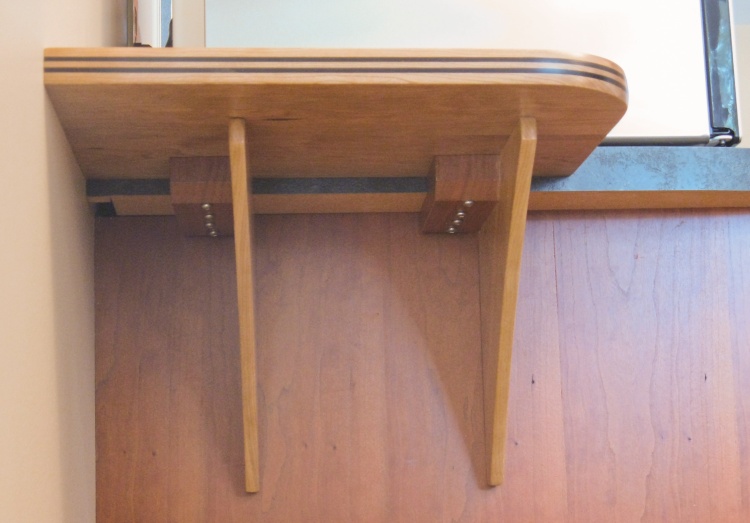
The underside gubbins
A plethora of 2" screws keeping things together.
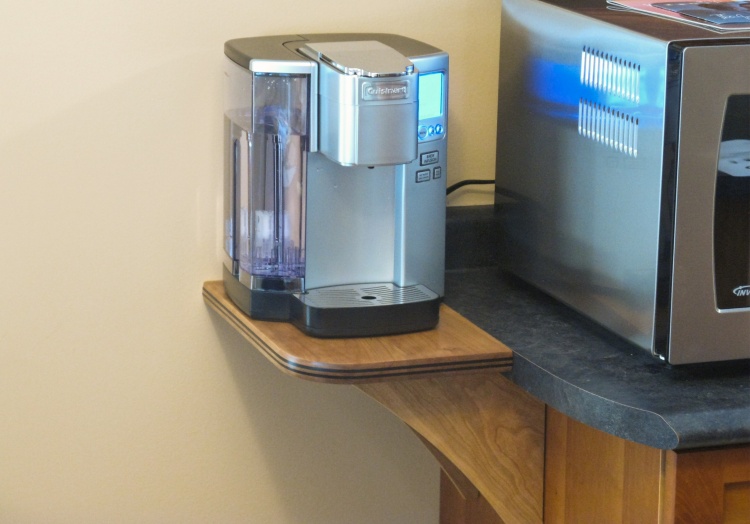
Like it was made for it!
The new pot seemed to fit just fine.